How to format a USB drive
Erase your drive's data quickly and easily by formatting it
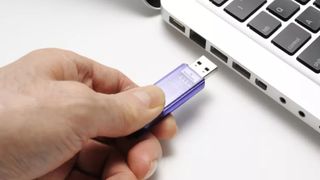
Formatting your USB drive is an efficient way to erase all your data, freeing the drive to be used elsewhere. While this is the most common reason people format a USB drive, other use cases exist.
If you're trying to use the same USB drive between macOS and Windows, formatting it can be easy to ensure the file system is compatible with both operating systems before you start using the drive. Formatting a USB drive can also improve performance, remove pesky viruses, and allow you to customize security settings.
Whether you need to format a USB drive for data, cross-platform compatibility, or optimized performance, here's how to do it on both Windows and macOS.
What you should know before formatting a USB drive
The most important thing to know about formatting a USB drive is that it'll wipe your drive of any data. Plug your USB drive into your computer to see if there are any important documents, photos, videos, or other data you want to back up before formatting it.
It's also worth noting that USB drives have multiple file formatting systems. The most common formatting option is FAT32, which is recognized by macOS, Windows, and Linux. However, it limits files to 4GB in size and offers zero security.
The more updated version of FAT32 is known as exFAT. This file formatting system is also compatible with macOS, Windows, and Linux but has a much larger file size limit.
Because FAT32 and exFAT file systems are multi-OS compatible, these are typically the most intelligent choices when selecting a format option.
Stay in the know with Laptop Mag
Get our in-depth reviews, helpful tips, great deals, and the biggest news stories delivered to your inbox.
That said, there are also macOS- and Windows-specific file systems that can be beneficial if you only use one ecosystem.
NTFS, or NTFS5, is developed by Microsoft for Windows, though it's also compatible with Linux and offers high file size limits. Apple develops APFS to support higher file size limits for macOS, and it's only compatible with newer Macs running macOS 10.13 or higher.
How to format a USB drive on Windows
1. Connect the USB drive to your Windows computer via an available port.
2. Open File Explorer by clicking on the folder icon in the taskbar or using this keyboard shortcut: Windows key + E.
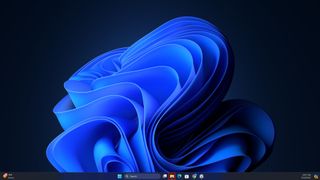
3. Choose This PC from the left menu in File Explorer.
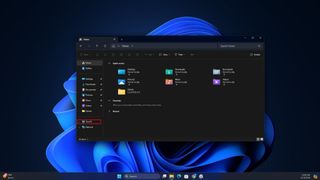
4. Under the Devices and drives header, locate your USB drive and right-click it.
5. From the pop-up menu, select Format.
6. In the dropdown menu below File system, select the default option. This will usually be FAT32, the most common format recognized by both Windows and macOS.
7. Choose the default option in the dropdown menu below Allocation unit size.
8. Below Volume label, type the name you'd like to recognize your USB drive by.
9. If you've formatted your USB drive before and know it's not broken, you can check the box next to Quick format. Otherwise, leave it unchecked.
10. Click the Start button. A pop-up message will appear, warning that "Formatting will erase ALL data on this disk." Select OK to proceed with formatting.
11. When your drive is finished formatting, click OK to dismiss the pop-up.
How to format a USB drive on macOS
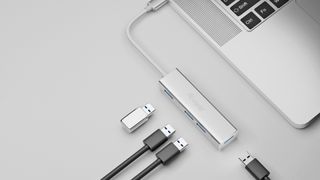
1. Connect the USB drive to your Windows computer via an available port. Many modern MacBooks don't have a USB-A port, so you might need a USB-C hub to connect your flash drive.
2. Click Go from the top menu bar and select Utilities from the dropdown menu.
3. Find Disk Utility and double-click it to launch the application.
4. Locate your USB drive on the left side and click it.
5. Click Erase at the top of the Disk Utility window.
6. Next to Format, use the dropdown menu to select MS-DOS (FAT). You can also change the name of your USB drive here in the text box next to Name.
7. Click Erase, and then click Erase again after being warned that this will delete all files on the USB drive.
8. Wait for the formatting process to complete, and then close the Disk Utility window. When the process is finished, you should see an icon for your USB drive on the desktop.
